Setting up Data Synchronization
When you sign up for Spira as a cloud-hosted subscription, you have the option of including the Spira DataSync service as an add-on feature to the subscription:
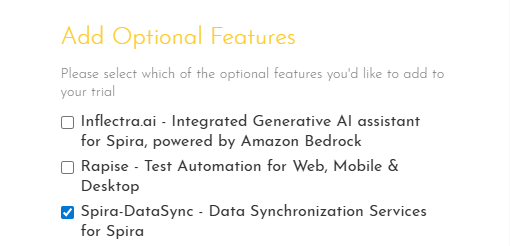
Make sure you include the ‘Spira DataSync’ add-on with your subscription. Once your subscription is provisioned, you will be able to configure the connection to Spira by going to your secure Customer Area on our website:

Click on the ‘Configure’ button associated with the Spira-DataSync addon row:
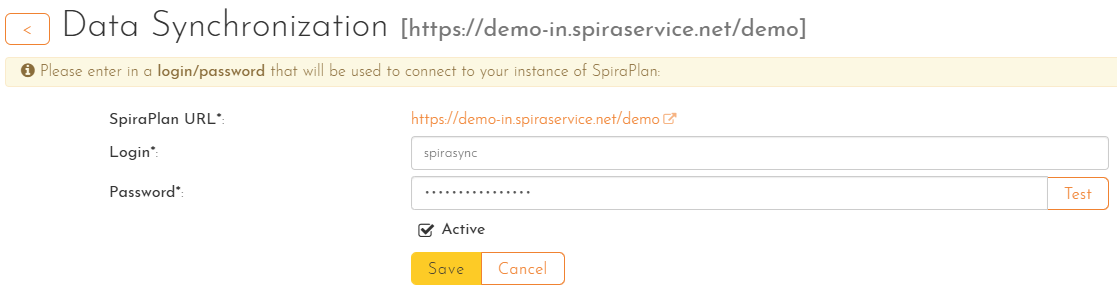
Enter a login and password that can connect to your Spira instance. This user needs to be a member of the project(s) that will be synchronized with the external bug-tracker and needs to have at least Incident create/modify/view permissions and Release create/modify/view permissions in these projects.
Click on the ‘Test’ button to verify the credentials, and once they validate, make sure the ‘Active’ flag is checked and then click ‘Save’.
You have now configured the synchronization.
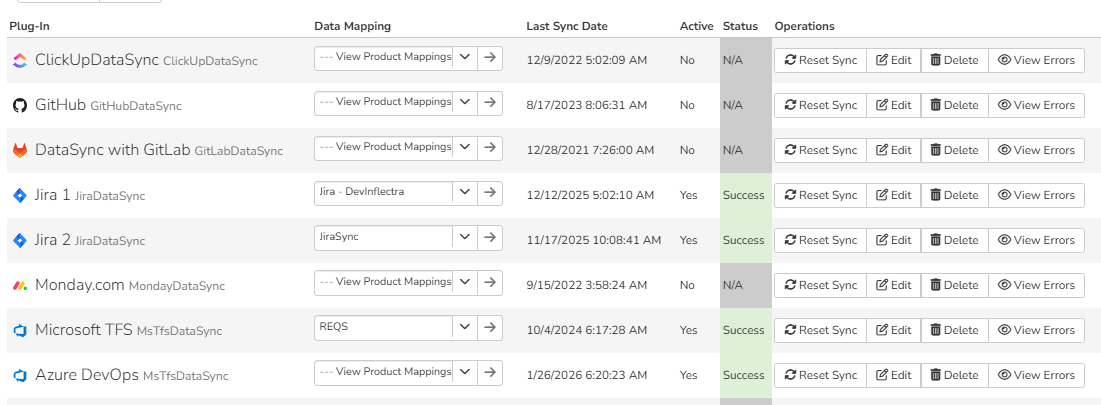
You should now see a list of the plugins currently configured in your Spira instance:
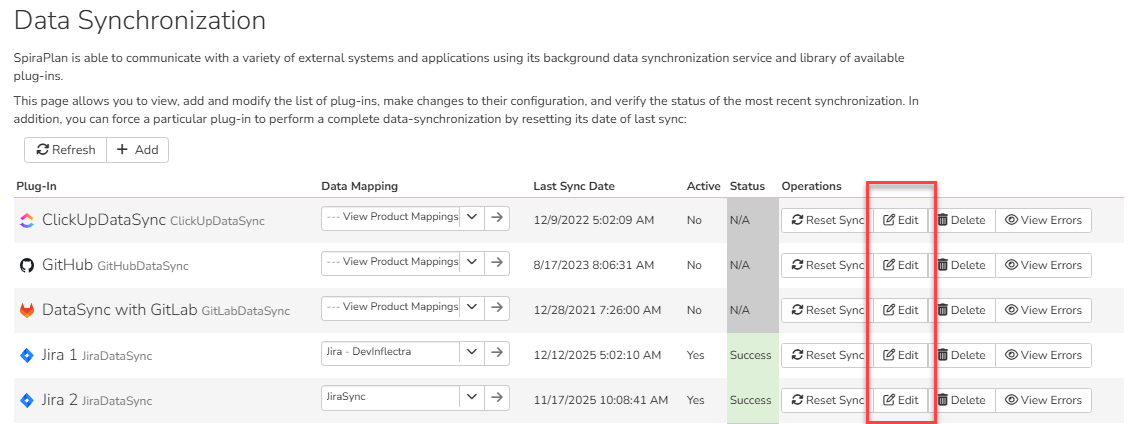
If you click on any of the ‘Edit’ buttons you will be taken to your Spira instance where you can complete the plugin configuration:
Configuring the Jira Plug-In
Once you have the cloud synchronization service configured, please view the Spira External Bug Tracking Integration Guide section 2 for the details of configuring the JIRA plugin for your instance.
In addition, if you'd like to display Spira information directly inside of JIRA, please use our new JIRA add-on that can be found in the Atlassian marketplace.