This article is obsolete. To find out about re-using test parts, modules and page objects please refer to Rapise 8.0: how to use Page Objects/Modules.
Consider a sample ATM banking application. The user should Sign In to make one of the available operations: Withdraw, Deposit, Transfer or Balance. After operations are complete the user should Logout.
Planning
The very basic test set for this application will contain separate test scenarios:
Test withdraw
- Sign On
- Do Withdraw
- Press Withdraw
- Choose Account Number
- Remember Current Balance
- Specify Withdrawal Amount
- Press OK
- Verify PLEASE REMOVE YOUR CASH message appears
- Verify that final Balance = initial balance - withdrawal amount
- Press OK to finish Withdraw
- Logout
Test deposit
- Sign On
- Do Deposit
- Press Deposit
- Choose Account Number
- Specify Deposit Amount
- Press OK
- Verify YOUR DEPOSIT IS COMPLETE message appears
- Press OK to finish Deposit
- Logout
Test transfer
- Sign On
- Do Transfer
- Press Transfer
- Select Destination Account
- Press Next
- Select Source Account
- Set Transfer Amount
- Press Next
- Check that CONFIRM TRANSACTION message is displayed
- Press TRANSFER Button
- Check YOUR TRANSFER IS COMPLETE message is displayed
- Press OK
- Logout
Test balance
- Sign On
- Do Balance
- Press Balance
- Verify data in the table
- Press OK
- Logout
All these scenarios have same common thing. Each of them starts with Sign On and finishes with Logout.
Implementing Test Set Structure
We are going to utilize the concept of sub-tests to share the common functionality between different test scenarios. We assume that all learned application objects and common functions will be stored in a single place. Each test scenario is to re-use common logic and to add its own scenario-specific logic and parameters.
We will reach the described goal in several steps.
Step 1: Create Base Test
We will call it a 'Base' because it contains all objects and common functions reused then in test scenarios.
In Rapise choose "New" to create a new test. Specify desired name. We will call the base test ATMBase in this tutorial:
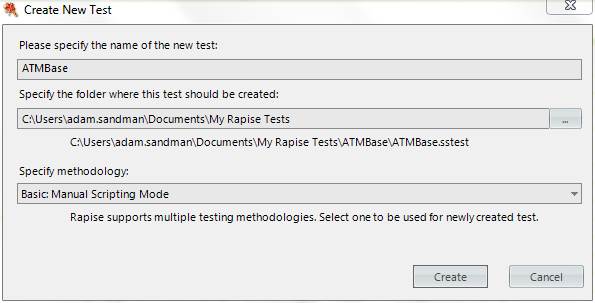
Press Create button to finalize the creation.
Step 2: Record Sign On and Logout
Open your web browser and go to the sample banking application:

Start Recording and chose the web browser as target application. Leave library selection as 'Auto':
Record a trivial scenario:
- Enter Username (user@mycompany.com)
- Enter Password (rapise)
- Press Sign-On
- Press Logout
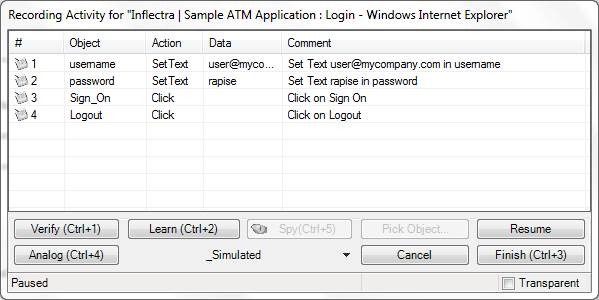
The Recording activity dialog will look like:
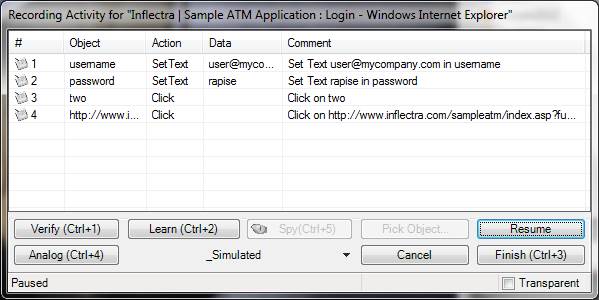
It is OK to press Finish (Ctrl+3) now. But as we see the contents of the 'Object' column are not readable.
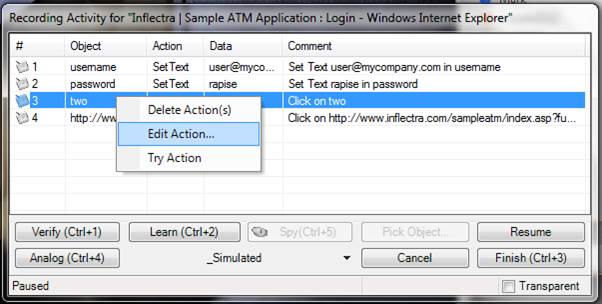
We prefer the button to be named as 'Sign On' rather than it is named now. So a good practice is to give object names while recording. So, let's right-click the corresponding action and choose "Edit Action..."
Now assign proper Object ID and Comment:
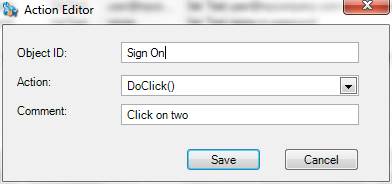
Finally we have human-readable IDs for Sign On and Logout buttons:
Everything is looking OK and we press 'Finish (Ctrl+3)' to finalize recording.
Step 3: Make a Login Function
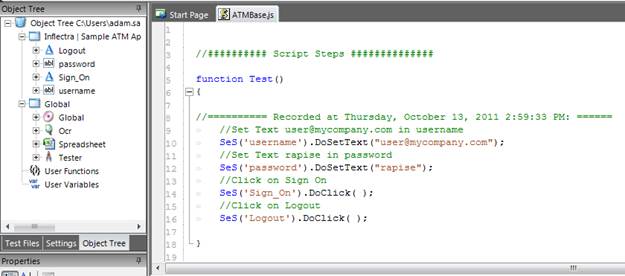
So we have a script with 4 steps and 4 Objects in the Object tree.
First 3 actions correspond to 'Login' functionality. So we want to put them into the 'Login' function. We can do this as follows:
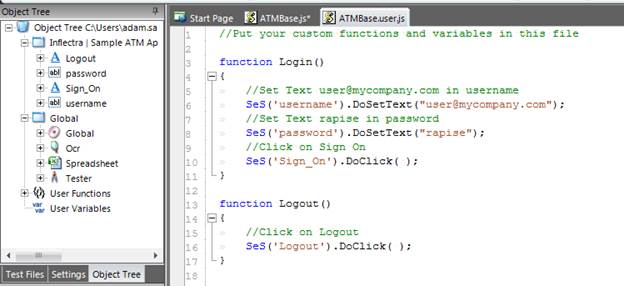
- Select 'Test Files' tab and double-click on ATMBase.user.js:
- Put stub for the new function:
function Login()
{

}
Finally Press Ctrl+S to save the changes
- Select ATMBase.js by selecting it in the Editor tab or by double-clicking on it in the Test Files tree.
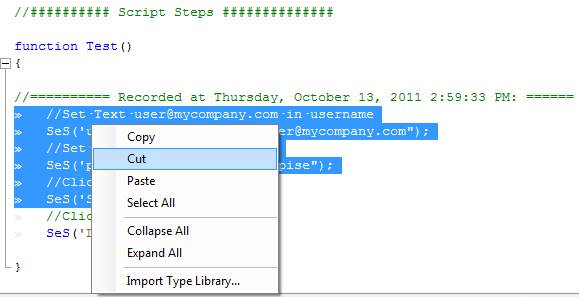
- In the editor select 1st 3 actions and Cut them:
- Now you may return to the Object Tree tab and do Refresh on it:
to see that the Login function is there:
Double click on the Login function and its body will be displayed in the text editor. Now choose the option to Paste inside it to populate it with the desired actions:
Step 4: Make a Logout Function
Making a Logout function is very similar to making the Login one. Finally you will have two user-defined functions:
Step 5: Create Sub-Test for a Deposit Scenario
- Create a Sub-Test to contain the Deposit logic.
Go to 'Test Files' tab and right-click on the Test folder:
Set the test folder name to Deposit. Uncheck 'New test should have own set of Objects' and 'New test should have own User-defined functions' checkboxes. This is because we want the subtest to reuse all the user-defined functions from the base test.
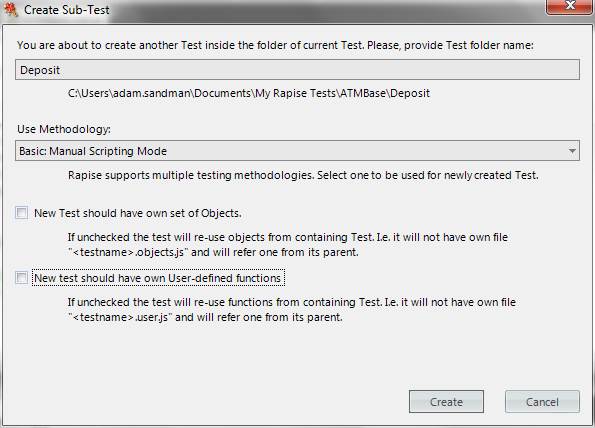
Press Create to finalize the subtest creation.
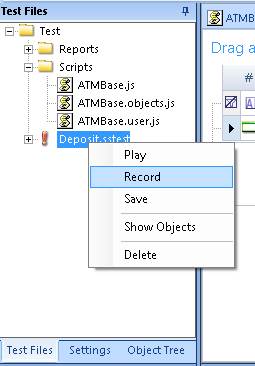
'Deposit.sstest' node now appears in the Test Files tree:
- Now, perform the recording of deposit-related actions using the context menu on Deposit.sstest:
Do the recording in the web browser starting from pressing the 'Deposit' button (there is no need to record the Login, we will re-use the existing function):
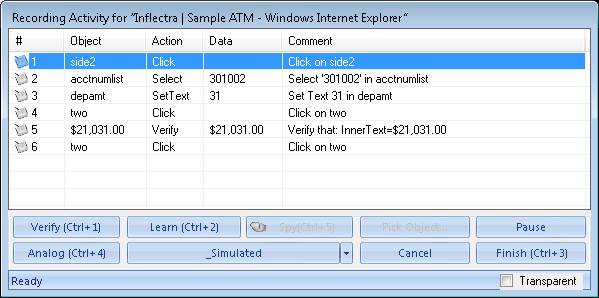
As before it is good to give proper names and comment to all recorded items:

And then finalize the recording.
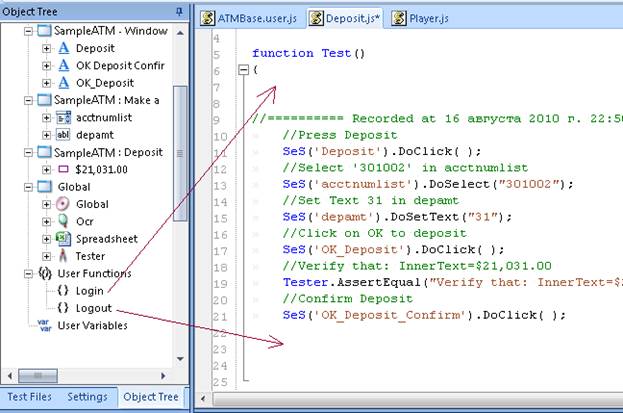
- Finalize the scenario by adding Login() to the beginning and Logout() to the end of recorded function. It is easy. Just drag function nodes from the Object Tree and drop to proper places in the Test() function:
Step 6: Execute the Deposit Scenario
To execute the Deposit scenario right-click on it in the files tree and press 'Play'
Call Scenario from the ATMBase Test
ATMBase test is now empty. We may use it to call our scenarios by dragging Deposit.sstest inside the Test() function of the ATMBase.js

This will insert proper scenario invoke logic:

Now all scenarios (we have only one now, but may have more in the future) may be launched from the toolbar using the Play button:

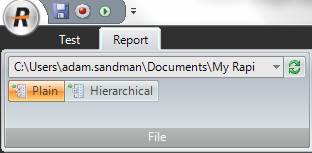
After test execution it may be useful to utilize the 'Hierarchical' view of the report:
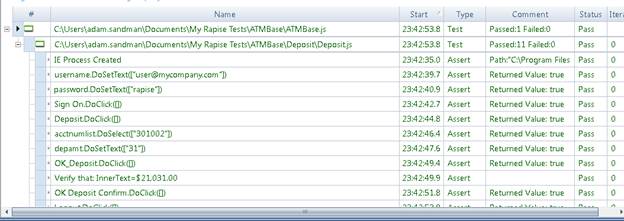
So the report is grouped by scenarios:
Refactoring Existing Test Set to Meet new Demands
As we can see our test plan has two pieces of common functionality: Login and Logout
This plan is very basic and may be greatly improved. For example, we may need to check:
- Deposit an amount greater than balance
- Do Deposit but skip confirmation
- Loop deposit-withdraw operations to check proper balance
- Stress-test deposit (do deposits of small random amounts) for a long period of time
One idea for further improvement is to re-factor the Deposit logic the same way as we did it for Login and Logout. It may be useful to re-use the 'Deposit' scenario in this case as a user-defined function. We may choose to add parameters to it to specify a deposit account and expected total amount.