Running Rapise GUI Tests with Jenkins
The purpose of this article is to demonstrate the execution of Rapise GUI tests directly from the Jenkins CI tool.
The recommended approach is to use SpiraTest and RapiseLauncher which are designed for this task. In some cases this is not an option and we need to execute tests directly with Jenkins. This is what we will do here.
Preparing Jenkins Node
Let's create a Jenkins node to run GUI tests.
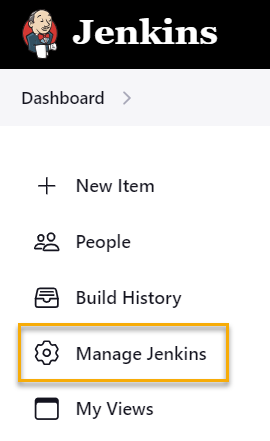
Choose Manage Jenkins:
Select Nodes:

Create New node:


Notice:
Node name is rapise_node (lowercase, no spaces)
Remote root directory is C:\JenkinsRunner (create this folder)
Launch method is Launch agent by connecting to the controller
The PC owning this node must be Windows host with Rapise installed. In general, one or many remote nodes may be chosen. In particular, it may be the host running Jenkins itself (if it is a Windows host).
For the Remote Root Directory we choose fixed path c:\JenkinsRunner. It is because some parts of the test files rely on the fixed path.
Starting Jenkins Node
Open the node and copy the execution command line to clipboard.

Open CMD in C:\JenkinsRunner folder and run the commands you just copied.
If you'll see the error tcpSlaveAgentListener is invalid 404 Not Found it means you need to enable Port for inbound agents. Go to Manage Jenkins, Security, section Agents, select Random and click Save.
If everything is configured correctly you should see the following output:

Also the node must be displayed as running in Jenkins:

Preparing Folder Structure
Test code may be stored either on the local folder or in Git. We use the fixed folder structure, so we may use absolute paths in the project configuration.
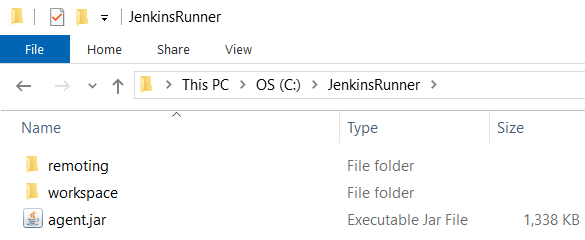
Note: remoting folder will be created automatically by Jenkins. Also agent.jar will appear after we will launch the new node for the first time.
Create workspace sub-folder. It will be used by the Jenkins node to look for the files.
Also create RapiseTest subfolder and put files from this Git repository in it.

RapiseTest is a project name we are going to create.
RapiseTest1 and RapiseTest2 are sub-folders containing tests to be executed.
runtests.cmd is the file doing execution and collection of logs. It looks as follows:
@set RUN_ROOT=%~dp0

@del /s/f/q %RUN_ROOT%RapiseTest1\Reports
@call %RUN_ROOT%\RapiseTest1\play.cmd
@echo ========== Output Log ==========
@type %RUN_ROOT%\RapiseTest1\last.tap

@del /s/f/q %RUN_ROOT%RapiseTest2\Reports
@call %RUN_ROOT%\RapiseTest2\play.cmd
@echo ========== Output Log ==========
@type %RUN_ROOT%\RapiseTest2\last.tap
This batch file executes 2 tests: RapiseTest1 and RapiseTest2.
If you want to execute more tests at once then this .bat may be expanded accordingly.
We store runtests.cmd in the Git repository. It may also be stored locally and referred by an absolute path.
Another approach for test execution is to make runtests.cmd that executes only one test and make and configure Jenkins to have many Projects each executing a single test. In such a case you may configure distributed parallel execution and achieve more fine-grained Jenkins execution status report, making it closer to what SpiraTest may do out of the box.
log_parse_rules.txt is the file we need for parsing logs (see below). It looks as follows:
ok /not really/

# match line starting with 'error ', case-insensitive
error /^not ok /

# each line containing 'BUILD' represents the start of a section for grouping errors and warnings found after the line.
# also creates a quick access link.
start / Output Log /
Preparing Tests
Each test in Rapise has a file play.cmd stored in its folder. It is automatically generated when you play a test with Rapise.
Here is what we need to prepare:
- Re-create final workspace structure, i.e. Node root/
workspace/ProjectName and save the tests in it. - Then open each test in Rapise and play it, so
play.cmd contains correct absolute paths. - If needed, commit & push.
Preparing Jenkins Project
Creating the Project
Let's create new Jenkins project called RapiseTest and assign it to rapise_node execution node created earlier:


You may configure Git (we are skipping this step as we have all tests locally)

Creating the Build and Post-Build Steps
Create a Build Step:

Configure it with the command:
%WORKSPACE%\runtests.cmd %BUILD_NUMBER%

We refer to runtests.cmd starting from the project root. However, it may also be stored locally and referred by an absolute path.
When your configuration contains parameters, you may assign them to environment variables before running a Rapise script, i.e.:
@rem Assign environment variable Flavor to Jenkins parameter Flavor
set Flavor=${Flavor}
@rem Use %Flavor% in the tests
%WORKSPACE%\runtests.cmd %BUILD_NUMBER%
Environment variables may then be consumed in the test scripts: https://www.inflectra.com/Support/KnowledgeBase/KB545.aspx
Finally we need to configure log parser. You need Log Parser Plugin for Jenkins to enable it. Install the plugin via Manage Jenkins > Plugins > Available plugins.
Create a Post-Build action:


The log parser uses rules for the .tap format (we dump TAP output to the console execution log in the runtests.cmd).
You may also archive Rapise native execution report with your test using HTML Publisher Plugin. Files that need to be published are **.trp.
Execution

Once RapiseTest project runs in Jenkins you should see GUI test execution on the Jenkins node host. Please, note that the node must be executed on the unlocked desktop. See more info on remote execution here.

Click on the build number to view details.

Then choose Console Output (parsed).

Log parser may provide information about failed assertions in your test.