Detailed Steps
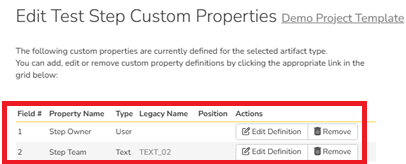
1. Set up the custom properties. In the example below, we have set up two custom properties at the test step level.
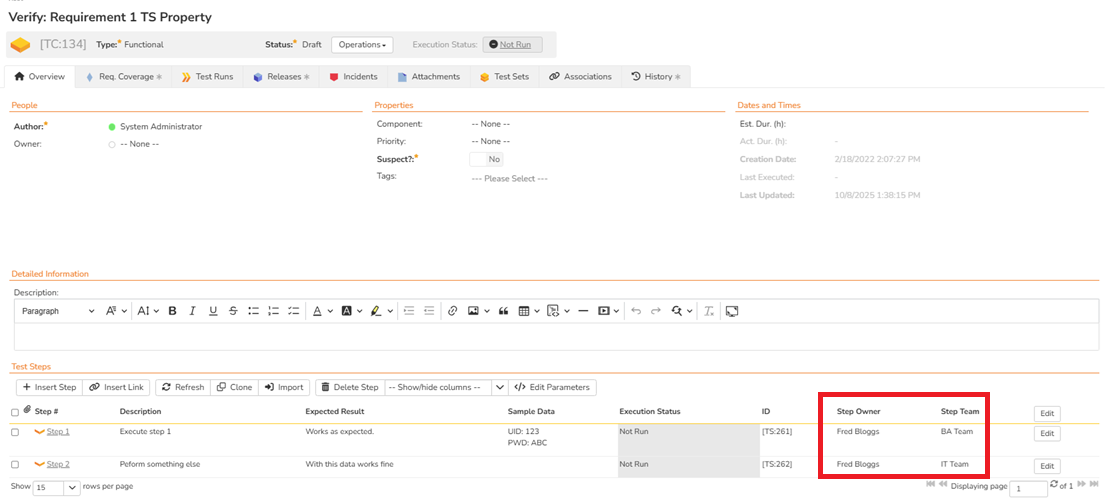
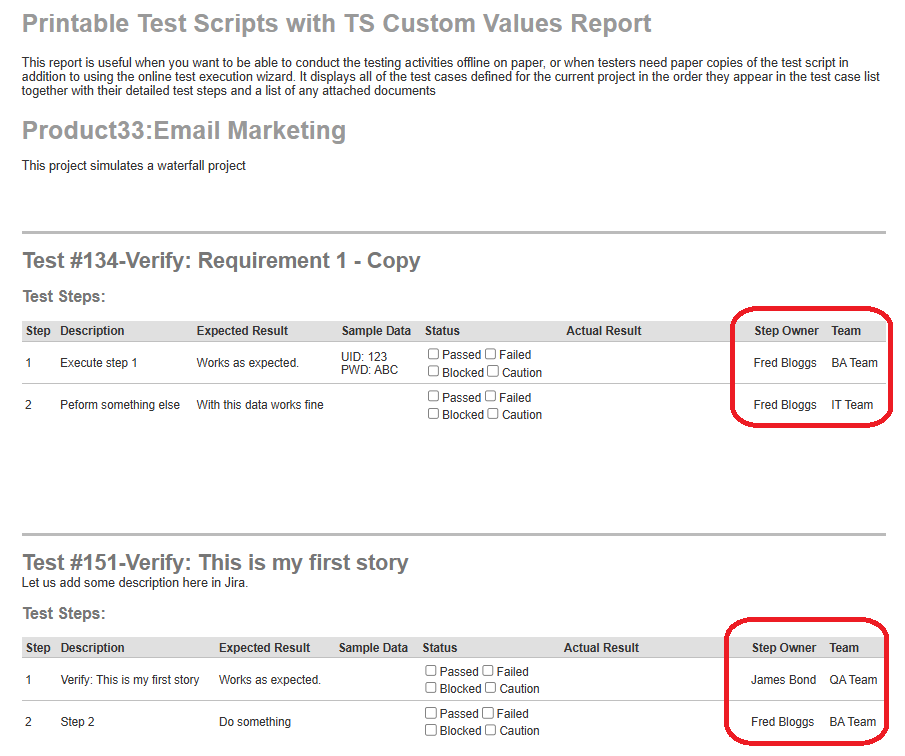
2. Make sure there is data at the test step level. In the example below, we show data at the test step level for one test case.
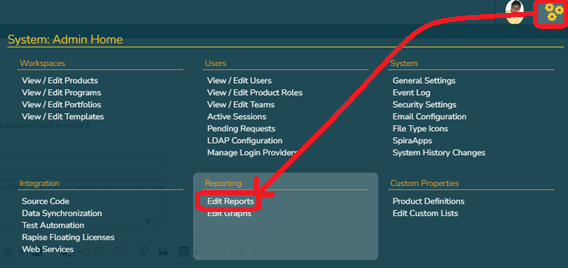
3. Go to the administrative panel, System - Admin section, Reporting and click on Edit Reports
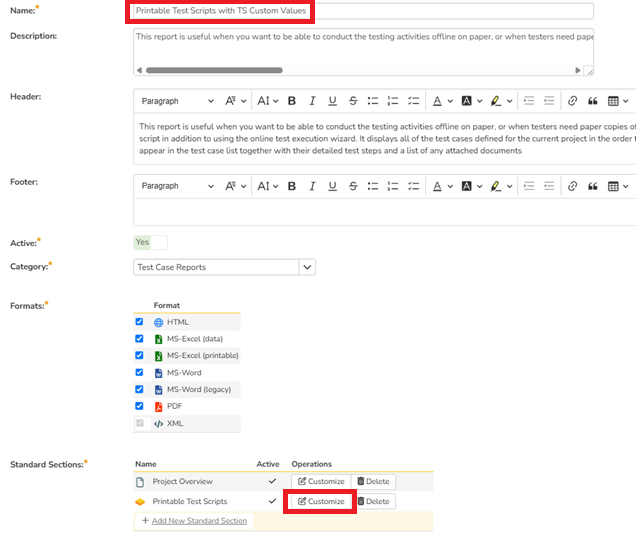
4. Click on "Clone" button near the Printable Test Script.

5. Update the Report Name (see below) and click "Customize" button near the "Printable Test Scripts" report.
6. Update the <table>...</table> section of the Printable Test Script section following the <xsl if test="TestRunSteps"><div class = "Title3">Test Steps:</div>.
        <table class="DataGrid">
          <tr>
            <th>Step</th>
            <th>Description</th>
            <th>Expected Result</th>
            <th>Sample Data</th>
            <th>Status</th>
            <th>Actual Result</th>
            <th>Step Owner</th>
            <th>Team</th>
          </tr>
          <xsl:for-each select="TestRunSteps/TestRunStep">
            <tr>
              <td>
                <xsl:value-of select="position()"/>
              </td>
              <td>
                <xsl:value-of select="Description" disable-output-escaping="yes"/>
              </td>
              <td>
                <xsl:value-of select="ExpectedResult" disable-output-escaping="yes"/>
              </td>
              <td>
                <xsl:value-of select="SampleData" disable-output-escaping="yes"/>
              </td>
              <td style="width:150px">
                <input type="checkbox"></input>Passed <input type="checkbox"></input>Failed<br></br>
                <input type="checkbox"></input>Blocked <input type="checkbox"></input>Caution
              </td>
              <td style="width:200px">
              </td>
                  <xsl:for-each select="CustomProperties/CustomProperty">
               <xsl:choose>
                <xsl:when test="Type='Date'">
                  <td class="Date">
                    <xsl:call-template name="format-date">
                      <xsl:with-param name="datetime" select="Value" />
                    </xsl:call-template>
                  </td>
                </xsl:when>
                <xsl:otherwise>
                  <td>
                    <xsl:value-of select="Value" disable-output-escaping="yes"/>
                  </td>
                </xsl:otherwise>
              </xsl:choose>
          </xsl:for-each>
            </tr>
          </xsl:for-each>
        </table>
6. Click Save for this update and again for the report.
Explanation
In the XSLT above, let us call out the two sections that has been modified.
1. In the table header definition, we have added the headers for the two custom properties - Step Owner and Team. They appear in the last two lines within the <tr></tr> tags.
        <table class="DataGrid">
          <tr>
            <th>Step</th>
            <th>Description</th>
            <th>Expected Result</th>
            <th>Sample Data</th>
            <th>Status</th>
            <th>Actual Result</th>
            <th>Step Owner</th>
            <th>Team</th>
          </tr>
2. In the following section, we are adding the data elements after the <td></td> tags for the actual results. First, we iterate through the list of custom properties using the for-each loop. Then, if the custom property is of the date format, then, we apply the date format. If the custom property is not of the date type, then, we list them as is.
<xsl:for-each select="CustomProperties/CustomProperty">
 <xsl:choose>
   <xsl:when test="Type='Date'">
     <td class="Date">
        <xsl:call-template name="format-date">
           <xsl:with-param name="datetime" select="Value" />
        </xsl:call-template>
     </td>
   </xsl:when>
   <xsl:otherwise>
     <td>
        xsl:value-of select="Value" disable-output-escaping="yes"/>
     </td>
   </xsl:otherwise>
  </xsl:choose>
</xsl:for-each>
Report Output
Additional Thoughts
The Printable Test Scripts is meant to be printed. So, when you add custom properties at the test step level, please be aware of the number of properties you add. If there are many properties that you add, then, they will not render well within the 8.5x11 inch margins and be cut off.