Step-by-Step Instructions
Open Rapise and launch the Selenium Settings dialog.
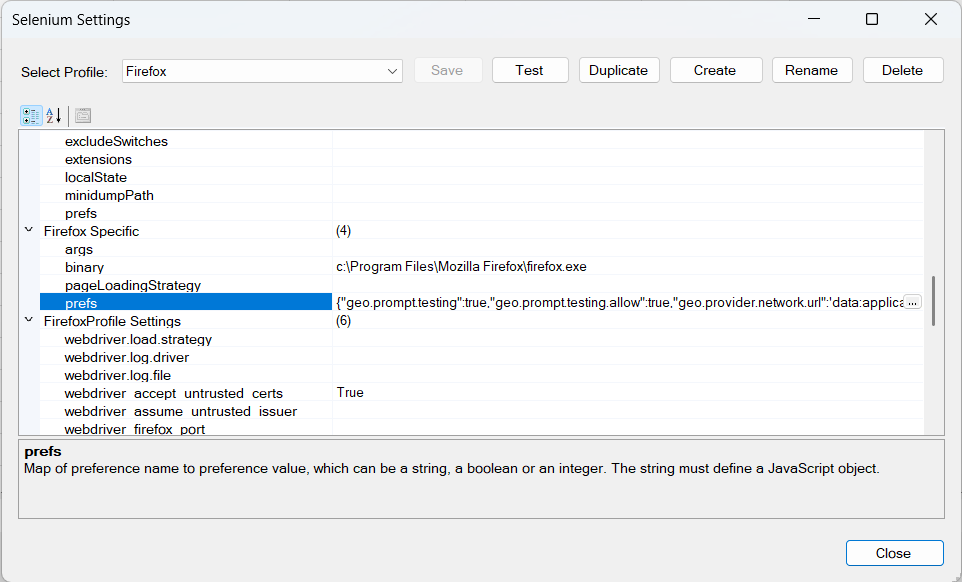
From the Select Profile dropdown at the top of the dialog, select Firefox.
(Tip: If you don't want to modify your default Firefox profile, you can click the Duplicate button to create a new profile specifically for geolocation testing, e.g., "Firefox_GeoMock").
In the property grid below, expand the Firefox Specific category.
Locate the prefs property.
Click inside the value field for prefs and paste the following configuration string:
{"geo.prompt.testing":true,"geo.prompt.testing.allow":true,"geo.provider.network.url":'data:application/json,{"location": {"lat": 40.7128, "lng": -74.0060}, "accuracy": 100.0}'}
Click the Save button at the top of the dialog to apply your changes.
How It Works
The configuration string you pasted provides specific preferences directly to the Firefox browser upon launch:
"geo.prompt.testing": true and "geo.prompt.testing.allow": true: These two settings instruct Firefox to bypass the standard user permission popup and automatically grant location access to any website that requests it.
"geo.provider.network.url": 'data:application/json,...': This overrides Firefox's default location provider (which usually asks your OS or Google/Mozilla APIs for your actual location). Instead, it feeds the browser a hardcoded data string formatted as JSON.
Customizing Your Location
The example string provided above sets the browser's location to New York City, NY (lat: 40.7128, lng: -74.0060).
To test a different location, simply modify the lat (Latitude) and lng (Longitude) values inside the configuration string before saving your profile.