Overview
While video recording for Android devices via Appium has traditionally been natively supported out-of-the-box, recording iOS test execution requires a specific underlying media library. In modern Appium versions using the decoupled XCUITest driver, iOS video recording is fully supported and highly stable for both real devices and simulators.
Because Rapise utilizes the C# Appium bindings under the hood, you can easily control iOS screen recording directly within your Rapise test scripts using the AppiumDriver global object.
Step 1: Install ffmpeg on the Mac Host
Unlike Android, which handles recording natively via ADB, iOS screen recording requires a third-party multimedia processor to capture and process the video stream. You must install ffmpeg on the Mac computer that is hosting your Appium Server.
The easiest way to install ffmpeg on macOS is by using Homebrew:
Open the Terminal on your Mac host.
Run the following command:
brew install ffmpeg
Once the installation finishes, you can verify it is installed correctly by running ffmpeg -version.
(Note: iOS screen recording requires an iOS Simulator running Xcode 9+ or a real device running iOS 11+).
Step 2: Recording Video in Rapise
Within your Rapise test script (JavaScript/RVL), you can easily trigger the video recording using the built-in AppiumDriver actions.
Starting the Recording
Just before the sequence of test steps that you want to record, call the start method:
RVL

JavaScript
// Start the iOS screen recording
AppiumDriver.StartRecordingScreen();
Stopping the Recording
At the end of your test sequence (or ideally inside a teardown block to ensure it fires even if a test fails), stop the recording:
RVL

JavaScript
// ... Execute your iOS test steps ...
SeS('Logout').DoClick();

// Stop the recording and capture the output
AppiumDriver.StopRecordingScreen();
Step 3: Viewing the Video File and SpiraTest Integration
You do not need to write any custom code to decode or save the video file. When AppiumDriver.StopRecordingScreen() is called, Rapise automatically does the following behind the scenes:
Stops the recording on the iOS device.
Decodes the video stream and saves it as an .mp4 file inside your test's local Reports folder (e.g., Main_YYYY-MM-DD_HH-MM-SS.mp4).
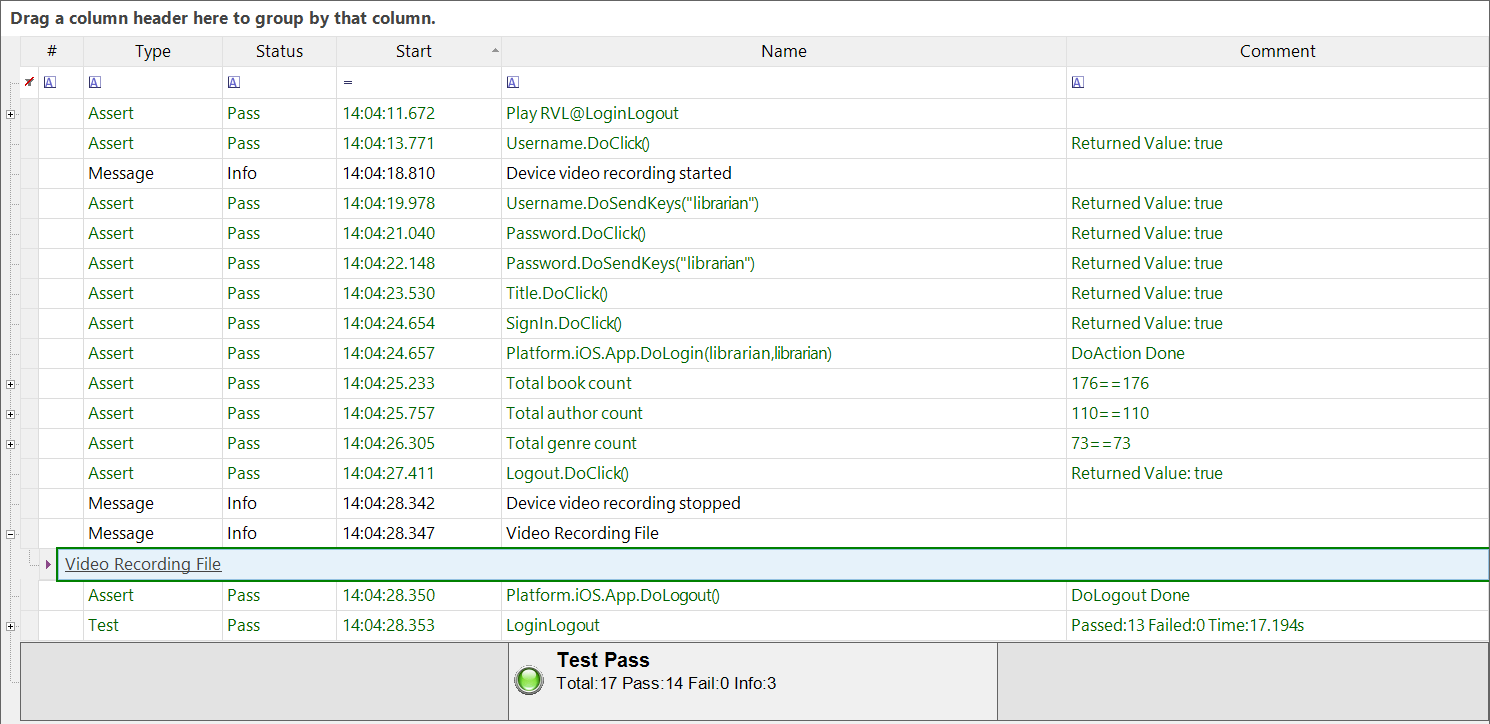
Injects an Info message (Device video recording stopped) into the Rapise execution report, followed immediately by a clickable link to the generated video file.
You can click the Video Recording File link directly from the Rapise report viewer to watch the execution video.
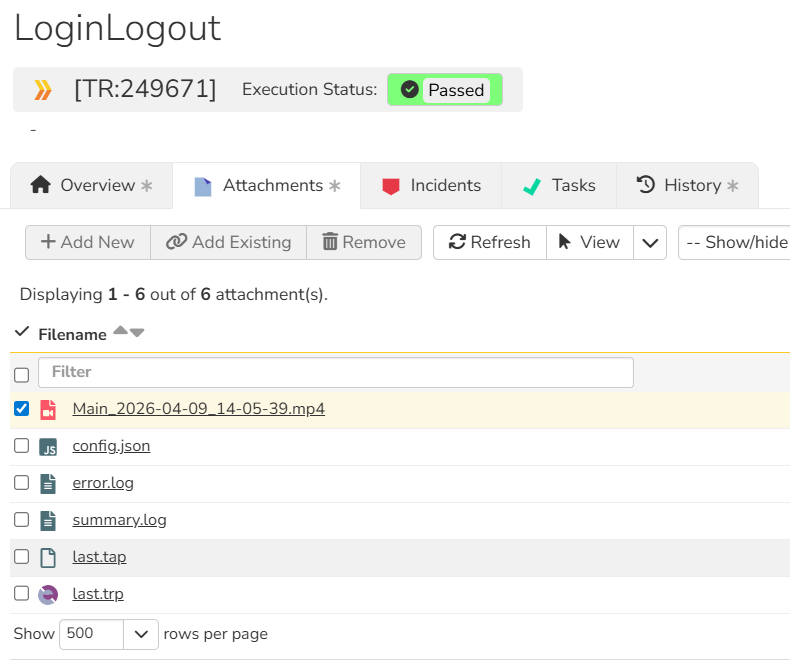
Integration with SpiraTest:
If you are executing your tests as part of a CI/CD pipeline or scheduled run using RapiseLauncher, the automatically generated .mp4 file will be uploaded and attached to the corresponding Test Run in SpiraTest. This allows your QA team to easily view video evidence of test failures or successes directly from the SpiraTest web interface.
To view the recording, click on the file link. Another tab will open.
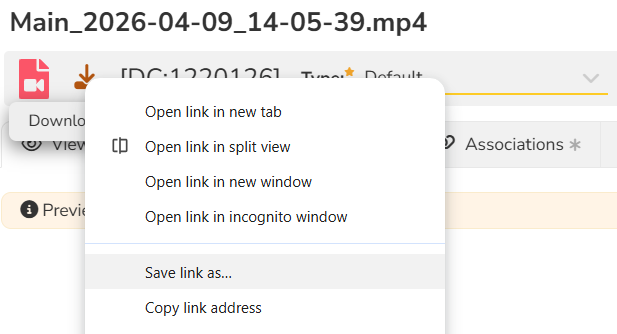
Instead of left-clicking the download icon, Right-click the download icon.
Select "Save link as..." (or "Save target as...").
Save the .mp4 file to your desktop or downloads folder.
Open the downloaded file using a native media player like VLC Media Player, Windows Media Player, or the Movies & TV app.