Preparing Safari for Automation
For security reasons, Apple requires manual configuration to allow external tools to automate Safari. Follow these steps on your macOS machine:
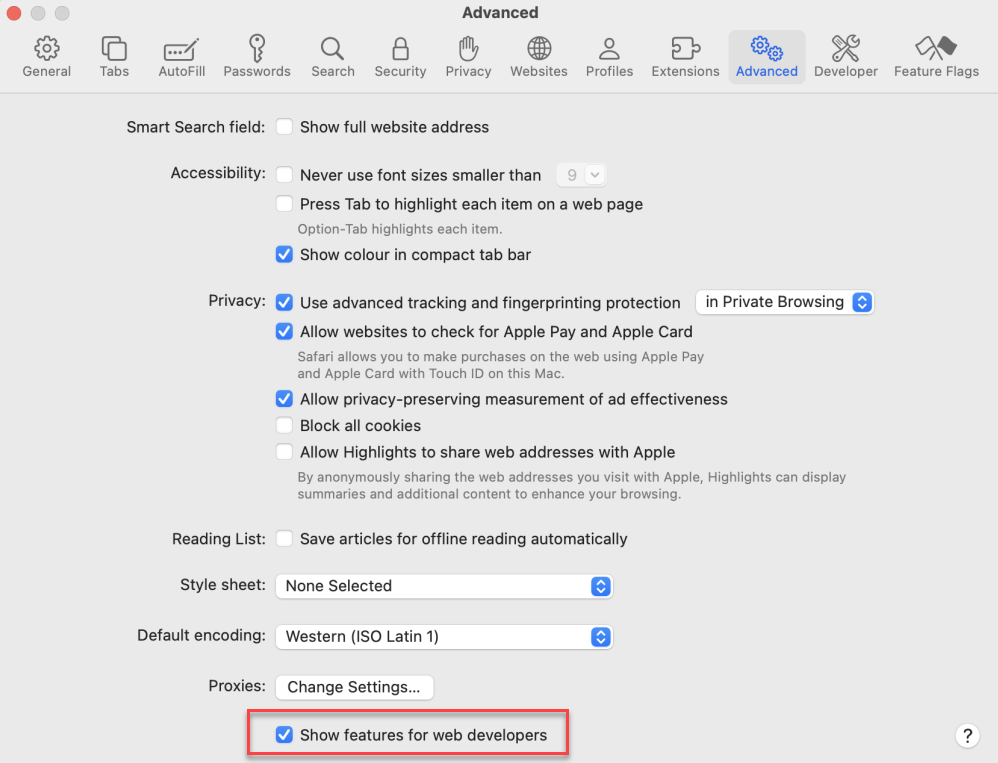
Enable the Developer Menu
Open Safari.
From the menu bar, navigate to Safari > Settings.
Go to the Advanced tab.
Check the box at the bottom that says "Show features for web developers".
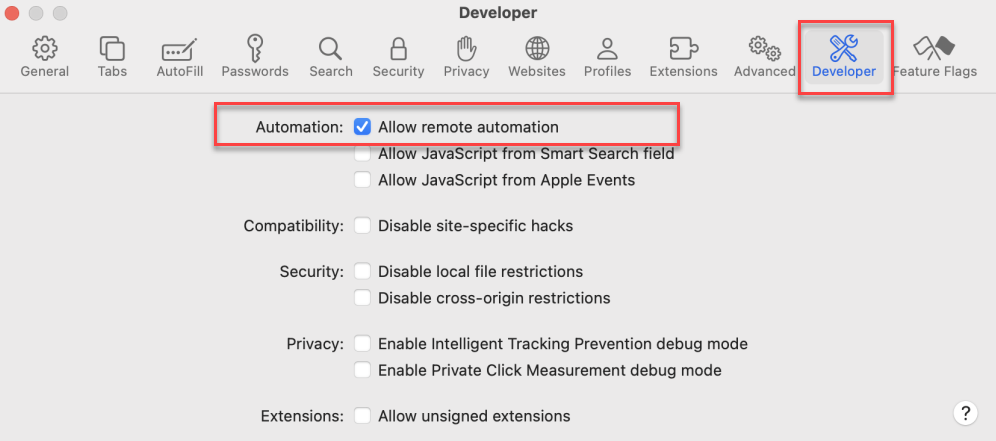
Allow Remote Automation
Authorize the Safari Driver
Open the Terminal application on your Mac.
Execute the following command to enable and authorize Safari's WebDriver:
/usr/bin/safaridriver --enable
You may be prompted to enter your password to complete the authorization.
Downloading and Running the Selenium Standalone Server
To orchestrate the communication between Rapise and Safari, you need the Selenium Standalone Server.
Prerequisites
Download the Selenium Server JAR
Run the Server in Standalone Mode
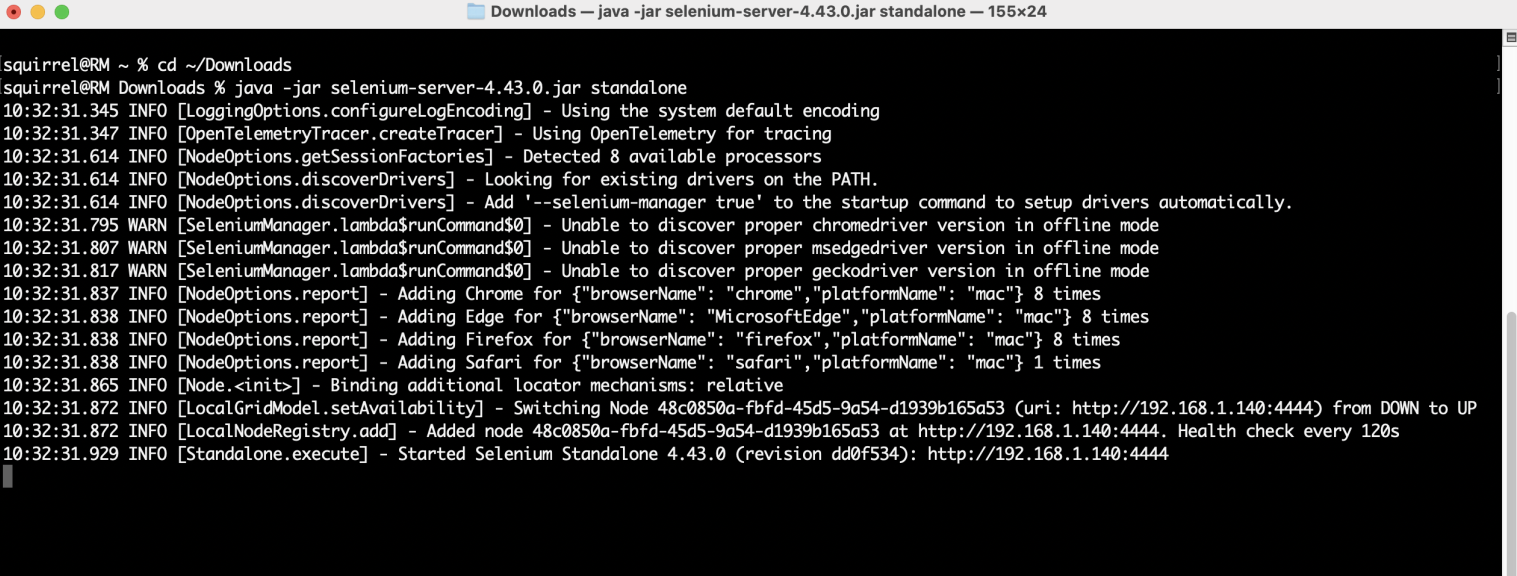
Open the Terminal application.
Navigate to the directory where you downloaded the JAR file (e.g., cd ~/Downloads).
Execute the following command to start the server:
codeBashjava -jar selenium-server-4.43.0.jar standalone
(Replace 4.43.0 if you downloaded a different version).
The server will start by default on port 4444. If the command executes successfully, you will see a confirmation message in the terminal indicating that the server is running.
Configuring the Selenium Profile in Rapise
The final step is to configure Rapise to use the running Selenium server on your Mac.
Find your Mac's IP Address
On your macOS machine, go to System Preferences > Network.
Select your active network connection (e.g., Wi-Fi or Ethernet).
Click Details... and Navigate to TCP/IP tab. Your IP address will be displayed. Note it down for the next step.
Create and Configure the Safari Profile in Rapise
Open Rapise on your Windows machine.
Go to Settings > Selenium.
In the Selenium Settings dialog, either select the existing Safari profile or click the "Duplicate" button to create a new one. Give it a descriptive name (e.g., "Safari on Mac").
Configure the following settings for your new profile:
Click the "Test" button to verify the connection. If the configuration is correct, Rapise will successfully connect to the Selenium server on your Mac.
Click "Save" to store the profile.
You can now select your newly configured "Safari on Mac" profile in Rapise to run your web tests. Rapise will send the commands to the Selenium server on your macOS machine, which will then execute the test steps in the Safari browser.